How we do Photogrammetry
Drone photogrammetry is the process of creating accurate two-dimensional and three-dimensional digital models from a series of overlapping aerial photographs. Rather than capturing a single image, the drone follows a carefully designed flight path, taking hundreds—or even thousands—of photographs at regular intervals. Each image overlaps with the next, allowing photogrammetry software to identify common features and reconstruct the landscape in three dimensions. The result is a detailed digital representation that can be measured, analysed, and integrated into CAD, GIS, and BIM workflows.
Step 1 - Planning
Every successful survey begins with understanding your project requirements.
Before any flights are planned, we establish:
- Survey objectives
- Site boundaries
- Deliverables
This planning stage ensures the collected data meets your technical and operational requirements.
Step 2 – Creating the Flight Mission
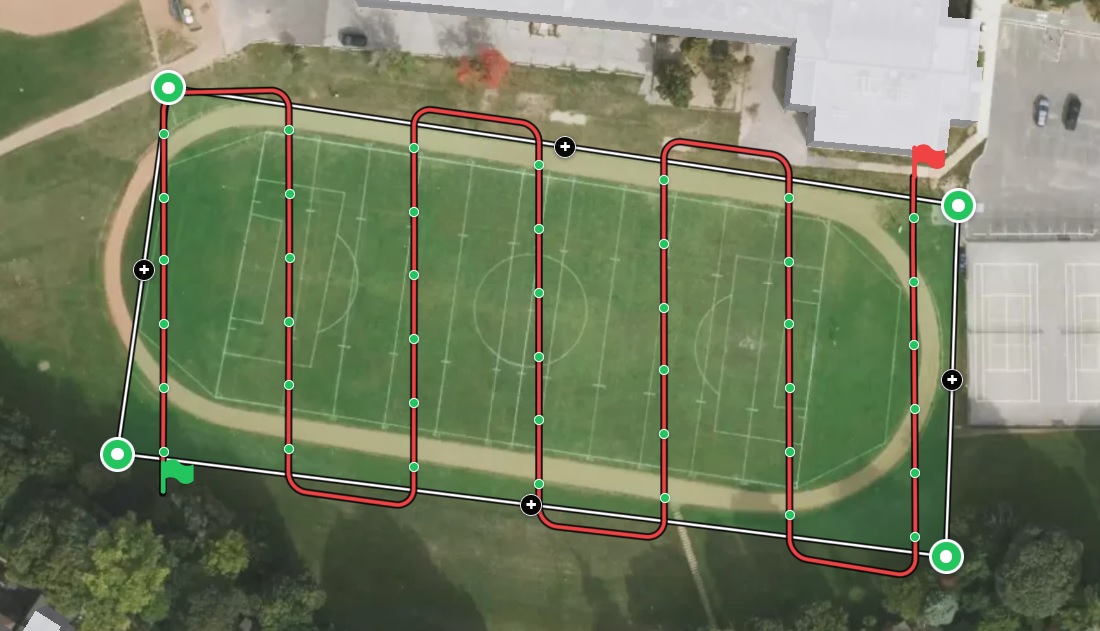
Before arriving on site, our team creates a detailed flight mission using desktop flight planning software. The survey area is defined on high-resolution satellite imagery or mapping data, allowing us to design an efficient flight that provides complete coverage of the site.
During mission planning, we configure key flight parameters including:
- Survey boundary
- Flight altitude
- Flight speed
- Camera angle
- Image overlap
- Flight line spacing
- Take-off and landing locations
These parameters are carefully selected to achieve the required ground sampling distance (GSD), image quality, and survey accuracy.
The software automatically generates an optimised flight path consisting of parallel flight lines and image capture locations, ensuring consistent coverage across the entire survey area.
Step 3 – Autonomous Image Capture
Once the flight mission has been reviewed and verified, it is uploaded from the desktop planning software to the drone. Before take-off, the pilot confirms:
- Airspace restrictions
- Weather conditions
- Aircraft status
- GPS reception
- Camera settings
Because the flight has been pre-programmed, the aircraft can follow a repeatable route while maintaining consistent altitude, speed, and image spacing throughout the survey. Once airborne, the drone follows the programmed mission automatically. As it travels along each flight line, the onboard camera captures high-resolution photographs at predetermined intervals. Each image overlaps neighbouring photographs, typically by 75–85% in the forward direction and 60–80% between adjacent flight lines. This high degree of overlap is essential for accurate three-dimensional reconstruction. Throughout the mission, the pilot continuously monitors the aircraft, maintaining visual contact, observing airspace conditions and ensuring safe operation while the drone performs the automated capture sequence.
Step 4 – Data Processing
After the flight is complete, the captured imagery is transferred to powerful desktop workstations for processing.
Step 5 – Delivering Your Data
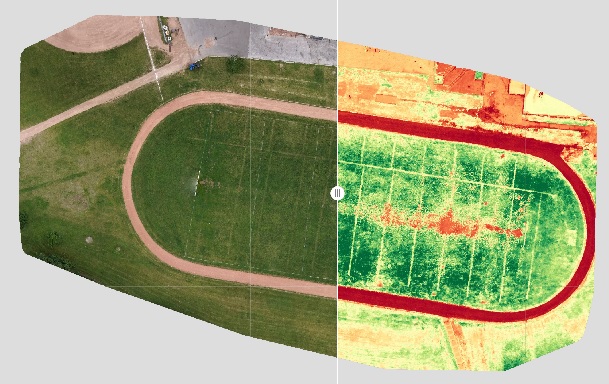
Depending on your project requirements, we provide a range of outputs suitable for engineering, surveying, planning, and asset management.
Typical deliverables include:
- Orthomosaic imagery
- Dense point clouds
- Digital surface models (DSM)
- Digital terrain models (DTM)
- Contour mapping
- Textured 3D models
- Volume calculations
- CAD-compatible exports
- GIS datasets
- Inspection imagery
Deliverables are provided in widely supported industry formats, making integration into your existing workflow straightforward.
Back